Debtor PO Numbers
Advanced Sales Order Processing makes extra use of the Debtor PO Number field. This number can now be validated to ensure sales orders are not duplicated by mistake, and documents may be sorted or retrieved by Debtor PO Number.
Debtor PO Number Validation
Debtor PO Numbers can be validated in the Sales Transaction Entry window to ensure duplicate numbers are identified. The action to take when a duplicate PO Number is detected is set in the Advanced SOP Setup window:
Ignore Duplicates - No validation of duplicate PO Numbers is performed.
Display Warning - The user is given a warning that the PO Number is a duplicate, but they can continue.
Display Error - The user is given a warning that the PO Number is a duplicate and they must change it before continuing.
Sorting and lookup by Debtor PO Number
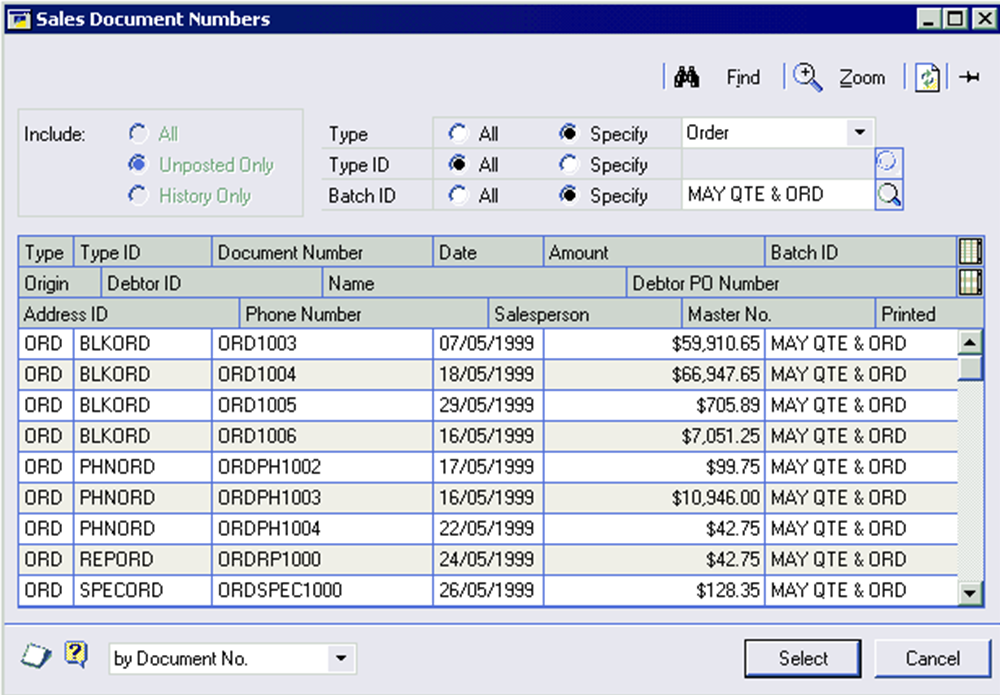
The new Enhanced Document Lookup Numbers window allows for sorting and searching by the Debtor PO Number.
Enhanced Document Lookup Window
If the ‘Use Advanced SOP document lookup window’ option is selected in the Advanced Sales Order Processing setup window, the standard Great Plains lookup will be replaced with the one shown below.

This window is available from the Sales Transaction Entry, Sales Order Fulfilment and Sales Documents Enquiry windows.
By using the ‘All’ or ‘Specify’ options, the user is able to quickly reduce the number of records displayed in the window, and thus find the data they are looking for more readily. Sorting and searching by Debtor PO Number is also provided.
Margin Amount and Percentage

The item lines in Sales Transaction Entry, Sales Item Detail Entry, Sales Transaction Enquiry Zoom, and Sales Item Detail Enquiry Zoom now show the margin amount and percentage for that line. The Margin amount is the difference between the Extended Price and the Extended Cost. The Margin percent is the Margin Amount as a percentage of Extended Price.
Unit Cost Amendment
If the ‘Allow user to amend Unit Cost on all transaction types’ option is ticked in the Advanced SOP Setup, the Unit Cost field in Sales Transaction Entry becomes editable. The Unit Cost of each item line can then be changed at time of entry. The cost specified on the line is then used through posting, instead of the normal cost for the item.
Print by Requested Ship Date
The Print Sales Document window has been modified to allow a range on the Requested Ship Date to be set. This range is handled the same way as the standard ranges.
Recalculation at Time of Posting
Standard Great Plains will recalculate the document values using the most current exchange rate when transferring an Order to an Invoice. The ‘Use exchange rate at time of posting’ option on the Advanced SOP Setup window, will cause the system to also recalculate when the Invoice (or Return) document is posted from SOP.
Additional Batch Details
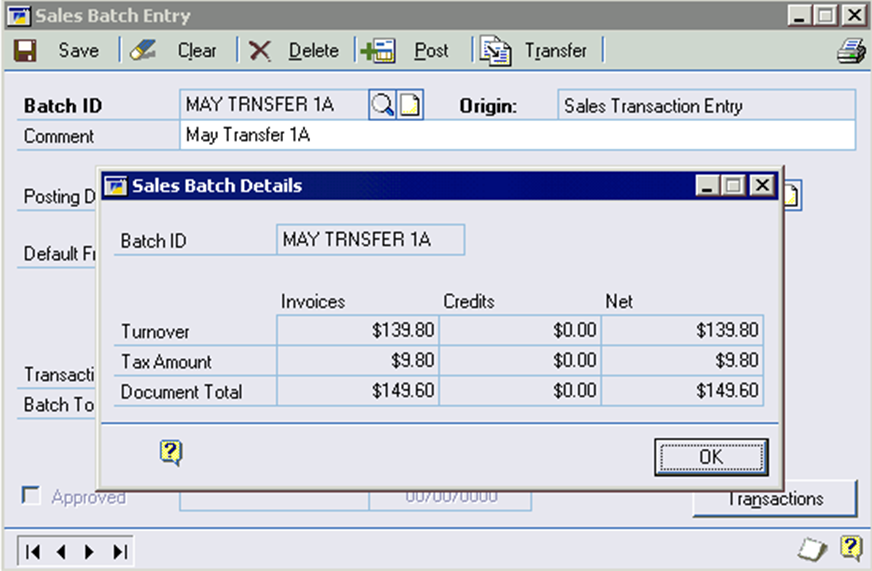
The Sales Batches window has been modified to include a new expansion button by the Batch Total field. This opens the Sales Batch Details window, as shown below.

The Sales Batch Details window shows the breakdown of invoices (or invoicable transactions, such as orders) against returns, and gives a net value for the batch. It also shows the breakdown of document values and taxes.
Advanced SOP Debtor Specific Entry
Location
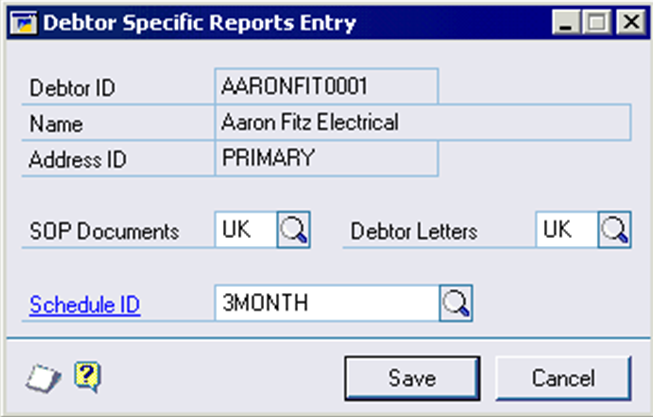
Extras, Debtor Specific Reports from Customer Maintenance window
Extras, Debtor Specific Reports from Customer Address Maintenance window
Layout

Processing
This window allows the default Distributed Schedule ID to be entered for a customer. See page 22 for more details on the Schedule ID.
Summarised Invoice Printing
You can print invoices with the lines being summarised into groups where the groups are specified at the item level.
Non IV items have a group defaulted from the Advanced SOP Setup window with the ‘Default Cat Value’ field. IV Items will default to a value in a category field against the item. Which category field is used is chosen on the Advanced SOP Setup window with the ‘Group Items By’ Field. When you are entering your lines you can look at the group by opening up the ‘Sales Item Detail Entry’ window where the ‘Group Category Value’ field holds the group for the item. This field can be overwritten if desired. When you print an invoice a drop down list field called ‘Summary Print’ will give three options:-
By Document This will use a user defined field against the invoice chosen on the Advanced SOP Setup window with the ‘Print Option’ Field. The summarised and regular options are assigned values from the user defined field.
Regular Print Invoices as before.
Summarised Print Invoices summarised.
Sales Copy Document
Location
Transactions, Sales, Advanced SOP, Copy Sales Documents
Copy Document button on Sales Transaction Entry
Layout

Processing
The Copy Document window allows for the copying of an existing Sales document of any type. The destination details are defaulted as in the Sales Transaction Entry window. The source document must be an existing Sales document.
The Type, Type ID and Batch ID fields default from the Sales Transaction Entry window if it was opened from there. These fields also provide the standard Great Plains lookup, zoom, expansion and note functionality.
The Copy From field is the source document for the copy. The lookup will display all documents of the selected Type and Type ID in WORK and HIST. It will also mark voided transaction with a *.
The Copy Record Note check box gives the option to copy any record note attached to the source transaction to the new one. If this is unchecked, record notes will not be copied across.
When the source document is a distributed invoice with a schedule, the new document will default its schedule from the Schedule ID, not take a copy of the existing schedule on the source document.