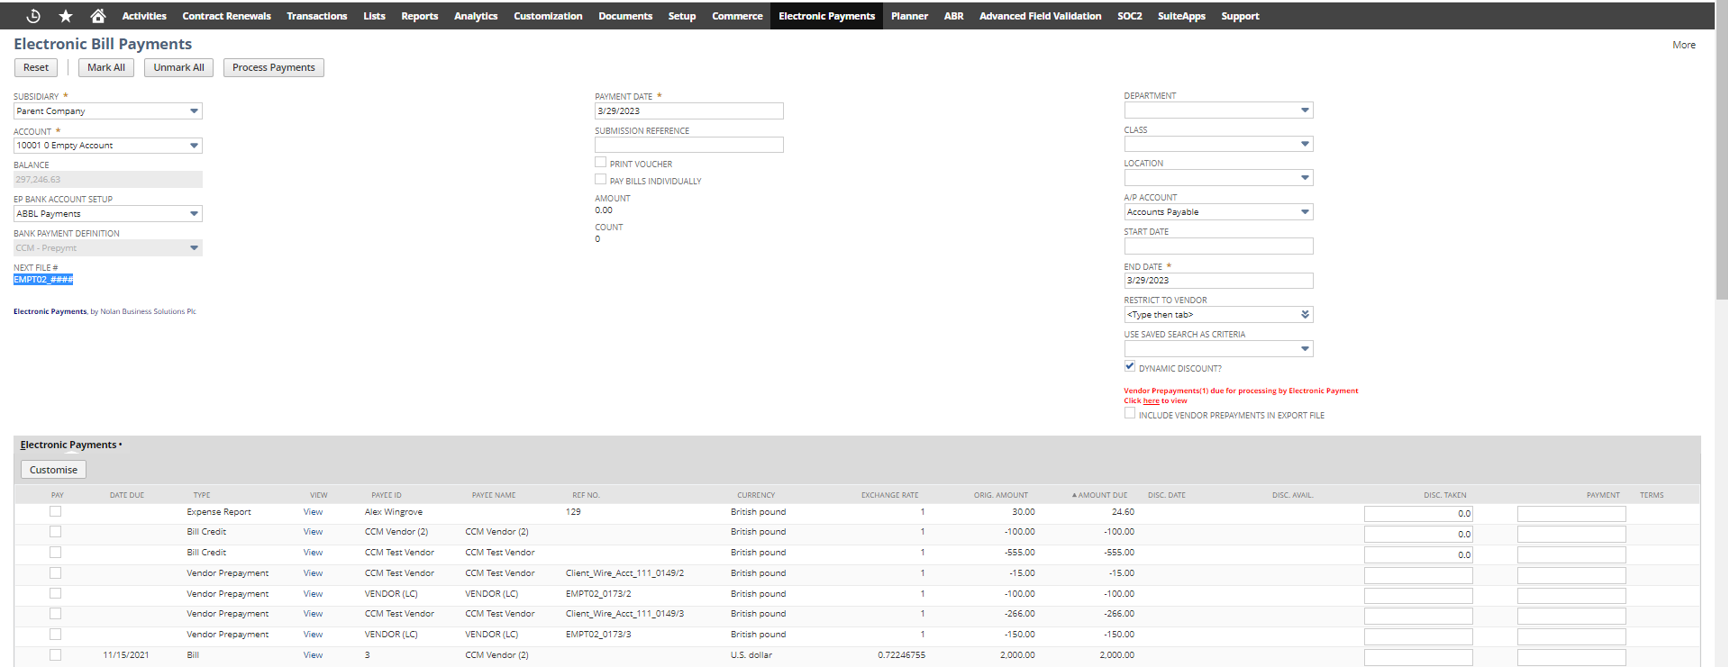
To pay multiple vendors:
1. Navigate to Electronic Payments > Transactions > Pay Bills.
2. Select a Bank Payment Definition from the list. When you select a bank payment definition, the bank account you are using to pay these bills appears in the Account field and the current balance of the account appears in the Balance field.
3. The Next Sequence # field auto fills with the next filename to be used for the selected bank payment definition.
4. The current date auto fills the Date field.
5. Enter a date in the Start Date field to limit the transactions in the list. The Start Date field is blank by default.
6. The current date auto fills the End Date.
7. Entering a start date and end date in their respective fields filters the list of payable transactions by due date. Payable transactions that do not have a due date entered will always appear on the list. Changing these fields will refresh the list of bills to pay.
8. Select an A/P Account to associate with this payment. Changing this field will refresh the list of bills to pay.
9. Enter a Submission Reference if required. This is a reference common to all payments and may be used in the bank export file.
10. If a printed voucher (remittance advice) is required, check the Print Voucher box.
NB. On this transaction, vendors who are set up for payment by electronic Payment are always paid by that method. To choose to print a check go to Transactions > Purchases/Vendors > Pay Single Vendor and select a payment method.
11. The lower part of the page shows a list of outstanding bills received from vendors. This list also includes expenses due to be paid to employees.
12. Check the Pay box next to the bills to pay. As bills are checked, the total amount of the payment appears in the Amount field at the top of the page. Click View next to a bill to open it.
13. Click Process Payments.
The Electronic payments processing page is shown below:

The user is redirected to the Electronic Payments status page.

To monitor the progress of payments, navigate to Lists > Custom Records > Background Processing Status which will show a list of in progress, queued and completed payment runs.

Drill down to the process record for more details. Any error messages will be logged against this record.

A bill payment created via the Electronic Payments processing page is shown below:
